Thursday, September 17, 2020

LS460 - Engine Bay Paint and Refresh.

With all the plastics in the engine bay I  wanted to add a personal touch to the engine bay. All the black side and front pieces are very grainy and I wanted a glossy finish to them. Every single pieces was sanded starting at 180 grit and made my way up to 400 grit incrementally. A thorough cleaning of the parts followed ensuring all wax, residues etc are stripped. Prep is key to good adhesion and the outcome of the paint job.

Pictures after the pieces were sanded  and prepped.


To prime the parts I used SEM High-Build Primer Surfacer. This is a flexible acrylic coating for priming steel, aluminum, urethane, fiberglass and plastics. It features superior adhesion and filling properties. When you are shooting this you can almost see strings of glue flying out. Product is awesome, it says it is easy to sand which to me was far from the truth!! WOW! What a pain in the ass. I don't know if I was doing something wrong but it just wouldn't sand after the first 5 minutes of sanding. It would just clog the paper up and seems like the surface hardens and does not want to sand. Everything else about this was awesome, very flexible and fills in because it is a high build primer. 


After an hour of trying to sand it with a block and 360 grit sand paper, I was getting no where. What I ended up doing was using 180 grit sand paper on a DA and using that to flatten everything smooth. My thought process was to sand it with 180 grit and put a nice smooth thin coat of regular primer on top. Below are pics of what the panels looked like after 180 grit and prepped again for a coat of primer.


Smooth and flat and after a coat of primer!!


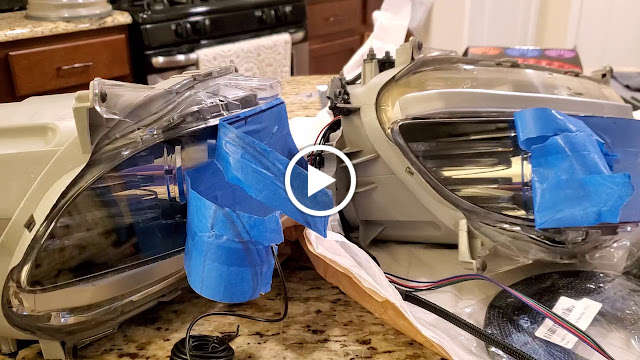
A quick wet sand and Jeremy laid some paint on it. I picked a Toyota color called Attitude Black, it is black but has a slight green, blue and purple pearls in it and it is very subtle, the light has to be hitting it at the right angle to actually see the effect. After the base coat, Jeremy used some 600 grit to level off a couple of areas that weren't as smooth, dusted more color on till everything looked smooth and level.

Panels after base coat. 


Panels after clear.


At night with the panels on.


You can see the effect when light hits it.


Mostly looks black otherwise.


Engine cover the silver looked a little bland so another Toyota color just to change things up a little.


Some of that pearl popping in the sun.


Pretty happy with how things look for now. 


-AJ Abraham

Follow me on Instagram:
@flawless_fitment
@aj_ls460
@aj_lx470
@aj_sc430

Monday, September 14, 2020

LS460 - Wind noise fix aka "JMcRaney Wind Noise Fix"

I would really like to thank Charles for documenting the fix and also for taking the time and effort to help me with it. I had messaged Charles to get a template in pdf format so I could make the template out of metal ahead of time and keep my down time low. Not only did he send me the template but he was kind enough to make and mail it out to me. Although I wasn't really experiencing a whistling noise etc I thought I would go ahead and preemptively fix the issue before I put my visors on. The instructions are well documented here so I'm not going to elaborate no it. I just added a little of my OCD and understanding of the fix into it. 

These are the tools that I used:
Non marring mini pry bars - to pry up the  trim
Plastic blades - clean up the double sided tape and glue from under the trim.
Caulk Applicator tool - to smooth out the caulking and fill in gaps.
Isopropyl Alcohol - clean up excess caulking and prep before 
silicone glue is applied.
Goo Gone - clean up tape and glue from under the trim.


After trim removal.


Used goo gone and scraped the tape off and also used the caulk applicator tool to get the gaps free from the old foam and glue. 


Wipe down with isopropyl alcohol. Prep is key for adherence to any substrate.


Taped up the gaps where the silicone glue is to be filled with. Prep is key.


Used the applicator tool to spread and push in the silicone glue. The different edges of the applicator tools helped smooth everything out and remove the excess glue.


Removed the tape, edges are clean.


The metal patch I scuffed up with 80 grit sand paper and wiped it down with isopropyl alcohol before more of the silicone glue was applied to adhere the patch. Pressed in the patch evenly and it'll squeeze out the glue from the sides and used the caulking application tool to scrape up all the excess glue and smooth out the joints. Used isopropyl alcohol again to clean up.


Full cure time is 24hrs but drove the car a couple of hours later and is still quiet. As mentioned I wasn't experiencing any weird noise issues, this was just a preemptive fix. I'll attach the black trim in a day or two after full cure and verify that there are no wind noises. Thank you again Charles for the help.

After about 48hrs and verifying that there were no issues with my install it was time to put the trim piece back on. I removed the taps that would normally clip the trim piece on, sanded the base with 50 grit sandpaper so the silicone glue has something to bite to, prepped both surfaces with IPA and spread some glue on and attached it.


I went ahead and taped up the edges . I squeezed the trim piece down and this squeezed out the glue around the edges. I used the grout tools again to wipe and smooth out the excess glue and used some tape to just hold the trim in place while it dried.


This is what it looks like with everything cleaned up and tape removed after about 4 hours.


I'm going to let it continue curing for a couple of days and then install my visors. Happy so far.


-AJ Abraham

Follow me on Instagram:
@flawless_fitment
@aj_ls460
@aj_lx470
@aj_sc430

Thursday, July 2, 2020

LS460 - Fog Light Mod

The LS460's fog lights from factory only comes on with the low beams on. With the high beams on the fog lights turn off. Wanted the flexibility of being able to turn on my fog lights, independent of the headlights. Want to thank Shibumi1 for documenting his version of the mod, I just modified it to do what I wanted. I did not want the fog lights on all the time nor did I want to put in another switch. I just wanted my fog lights on when the park lights come on and also full functionality of the factory fog light switch. The wiring diagram below is how I wired everything up. 


The baby blue wire below is the ground signal for the fog light switch. It is located under the steering column, just remove the plastics of the steering wheel column and the picture below is what you see with the bottom plastic piece removed.

(picture courtesy of daniel1235)

For the harness I planned on mounting all the relays etc up front behind the bumper support so ran the fog light ground signal wire from under the steering column through the firewall into the engine bay to the front behind the bumper support. Soldered all the wires, heat shrunk every connection and made a nice harness with some techflex wire loom. The below shows the harness but with some extra wires etc I wanted to run that ties in to the front I plan on doing later. Also the harness has a fused power wire to run the HID's for the fog lights.


The relays mounted behind the bumper support. 


For the fog lights to come on with the park lights, I tapped into the yellow wire on the harness that is connected to the headlights. Picture below shows the orange wire I used in my harness and tapped into the yellow wire. 


The JDM fog lights that were modified slightly.


-AJ Abraham

Follow me on Instagram:
@flawless_fitment
@aj_ls460
@aj_lx470
@aj_sc430

Wednesday, July 1, 2020

LS460 - Air Ride Plan & Prep

The LS460L although longer it looses a good bit of trunk space because of the additional rear air conditioning and cooler options. The last LS460 install I did was on the shorter wheel base and had a much bigger trunk but still wanted to retain as much of the trunk space as possible. For this one as well wanted to retain trunk space so everything went in the wheel well too. The only thing I did different on this one was to sound proof the wheel well and add noise isolators for the compressors.

Parts I used:
Air Lift (50714) Compressor Isolator Kit (x2)
Noico 80mil sound deadner
Quiet Barrier 1/4" High Density Sound Barrier
Viair 444C Compressor (x2)
Ridetech management
3/8" Airline for the front air bags
1/4" Airline for the rear air bags
SMC  check valve for the compressors 
DEI Heat Shroud

With the wheel well vacuumed and cleaned I used some isopropyl alcohol to wipe down the wheel well to make sure there was no grease etc to help give the sound deadening a better bond. The power wire and signal wires were ran to the trunk and the power wire has its own circuit breaker and kill switch. For the signal wire, I tapped into the utilities fuse in the fuse block on the passenger side under the glove box. 


Warmed up the back of the sound deadening and stuck it on. You can see the lines coming into the wheel well below. I drilled a 1.5" hole for the left and the right and was able to fit both the air lines and both level sensor wires for each side through it. All the lines coming out of the wheel well was wrapped with the DEI Heat shroud, just anywhere I thought might get affected by exhaust heat at all. The lines were ran under the car along the frame rails on either side. Have done this multiple times in the past without any issues. If the fuel lines and brake lines are going to be ok being run that way so should the air lines. The hole for the lines got sealed with flex tape to prevent contaminants entering the wheel well through the hole that was made. After the sound deadening was in place I test fitted where I wanted all the components. All the components are serviceable because I mounted bolts from under the wheel well and locked everything in place with lock nuts and washers. All the components slide onto the bolts and held in by nuts. Anything that need to be serviced, just remove the nuts and slide the component off. The tank, compressors on isolators and valve body is held down this way. 


Over the sound deadening went the quiet barrier. I did wipe down the sound deadening with IPA as well to clean up any grease etc again to make sure the quiet barrier would bond better.


With all the test fitting etc done I wanted to streamline the wiring a little and also wanted to make sure the valve body didn't have any trash in it. I had a rebuilt kit handy just in case it needed anything. Ran all the wires with some techflex wire loom, soldered and heat shrunk all the connections. Opened up the valves and just ran compressed air through the internals to get rid of any debris, added some oil to the o-rings and plunger and assembled everything 


The tank, painted and decaled.


Everything mounted and secured in the wheel well. 


Powered everything up and let the compressors fill the tank and verified that all the valves operate in the right order. Filled up the tank to 150psi and checked for any leaks with soapy water, no leaks. Filled up the tank and left it overnight to verify no leaks, no leaks!! With all that done, and if everything goes according to plan, I just need to mount the ride height sensors, put the bags on and connect everything. Fingers crossed.


-AJ Abraham

Follow me on Instagram:
@flawless_fitment
@aj_ls460
@aj_lx470
@aj_sc430